Inhaltsverzeichnis
Oracle Clusterware 12c R1 auf Oracle 12c R2 mit minimaler Downtime upgraden - Rolling Upgrade auf 12c R2 Cluster
Aufgabe:
Ein Oracle 12c R1 Cluster soll mit minimaler Downtime der Application auf 12c R2 aufgerüstet werden.
Bestehende Umgebung 12c R1 ⇒ Siehe Anmerkungen zu Installation des Oracle Real Application Cluster 12c R1 auf einem Oracle Linux 7
Vorbereitung
- Cluster Heath Check in der neusten Version - Cluster auf Herz und Nieren prüfen ⇒ Oracle 12c RAC Umgebung mit Oracle Trace File Analyzer (TFA) überprüfen bzw. Oracle 12c Linux RAC Umgebung mit ORAchk überprüfen
- Alles mit dem Tools prüfen und bei Bedaf fixen
- Application auf eigene Servicenamen umstellen um die Applikation schwenken zu können
- Altes Oracle Home zuvor auf notwendigen Patch prüfen bzw. letzen PSU einspielen, dazu müssen min 12GB auf der Platte frei sein! Bzw. prüfen ob der Patch „21255373“ ( war im PSU APR 2016 dabei) eingespielt wurde!
- Erneut den Plattenplatz kontrollieren, für das neue DB Home sollten min. noch 10Gb auf der Platte frei sein!
- ASM Diskspace für die GMIR Datenbank prüfen, es müssen min. noch 33,482GB frei sein!
- ASM Kompatible Parameter muss auf alle ASM Platten minimal 11.2.0.2.0 stehen!
- Software Pakete nachinstallieren, falls noch nicht vorhanden
- yum install psmisc
- yum install smartmontools
- yum install xdpyinfo
Ablauf
Software für die 12c R2 GI Intallation bereitstellen
- Oracle Database Grid Infrastructure 12.2.0.1.0 for Linux x86-64, 2.8 GB ; V840012-01.zip ⇒ https://edelivery.oracle.com (MD5 AC1B156334CC5E8F8E5BD7FCDBEBFF82)
- Patch für den Software Installer ⇒ Patch 25728869: GI UPGRADE DOES NOT DETECT THE GIMR DG WHEN NOT COLOCATED IN OCR/VD DG ; p25728869_122010_Generic.zip ⇒ https://support.oracle.com/ (MD5 4C38DE30A356B9272D1AD5C3B1FE5C3C)
Patch für bestehendes Homes bereitstellen (falls noch kein PSU eingespielt wurde)
- Patch für bestehendes Oracle GI Home von https://support.oracle.com/
- Patch 27468957: GRID INFRASTRUCTURE PATCH SET UPDATE 12.1.0.2.180417 (Patch) ;p27468957_121020_Linux-x86-64.zip; (MD5 5527CCFD68003B0B5663BFFCE9E50396 )
- Patch 6880880: OPatch patch of version 12.2.0.1.13 for Oracle software releases DB 12.1.0.x and DB 18.x;p6880880_121010_Linux-x86-64.zip; (APR 2018) (MD5 263B24D0C8CC9EDC17CC9601CDE35267)
Patch für bestehende Oracle Datenbank Homes 11g
- Patch 27338049: DATABASE PATCH SET UPDATE 11.2.0.4.180417 (APR 2018 ) ;p27338049_112040_Linux-x86-64.zip;( MD5 1DF74F2F779B594952E9E4EB5573627F )
- Patch 6880880: OPatch patch of version 11.2.0.3.19 for Oracle software releases 11.2.0.x and 18.x (APR 2018);p6880880_112000_Linux-x86-64.zip; (Patch) (MD5 52562DF3B8E206FD7C3CEC0EA31241E5)
Patch für neues Homes 12c bereitstellen
- Patch 27468969: GI APR 2018 RELEASE UPDATE 12.2.0.1.180417 - p27468969_122010_Linux-x86-64.zip - MD5 53510CEAAEB648A753353A149568C5FC
- The Grid Infrastructure Apr 2018 Release Update 12.2.0.1.180417 includes updates for both the Clusterware home and Database home that can be applied in a rolling fashion.
- Patch 6880880: OPatch utility version 12.2.0.1.6 or later ( My Oracle Support patch 6880880 ) ⇒ OPatch patch of version 12.2.0.1.13 for Oracle software releases DB 12.2.0.x and DB 18.x (APR 2018) (Patch) p6880880_122010_Linux-x86-64.zip ⇒ MD5 263B24D0C8CC9EDC17CC9601CDE35267
System überprüfen
- Applikation - Servcie Name Konzept überprüfen und einrichten, testen
- Betriebsystem Update
- Software bereitsstellen
- Cluster bestehendes Home den letzen PSU einspielen um Bug zu vermeiden
- Cluster Upgrade + Patch
- Liegt GMIR(_MGMTDB) auf z.b. +DATA muss noch der Installer gepatched werden!!
- DB Upgrade + Patch
- Backup Scripte umkonfigurieren
- Trace File Anlyser umziehen
Servcie Name Konzept überprüfen
Um die Applikation während eines Ausfalls eines Oracle Real Application Knoten weiter betreiben zu können ist es unabdingbar mit benannten Datenbank Services zu arbeiten.
Die Applikation darf sich nicht auf die SID bzw. auf den Servie mit dem SID Namen verbinden!
Dieser Service läßt sich nicht stoppen bzw. umschwenken!
Ziel ist es ja, das mit dem Schwenk des Service im Cluster die Applikation proaktiv die Datenbank Verbindungen abbaut und auf den verbleibenden Knoten umzieht!
Prüfen mit:
# DB User/DB Umgebung des Clusters verwenden
# 11g Syntax ! in dieser Umgebung läuft eine 11.2.0.4 im 12c Cluster
srvctl status database -d GPIDB
Instance GPIDB1 is running on node racdb01
Instance GPIDB2 is running on node racdb02

srvctl status service -d GPIDB
Bei Bedarf einrichten mit z.b. folgenden Parametern ( 11g Syntax, da noch 11.2.0.4 im Einsatz!):
srvctl add    service -d GPIDB -s intershopserv -r GPIDB1,GPIDB2  -P NONE
srvctl modify service -d GPIDB -s intershopserv -B THROUGHPUT  -j LONG

srvctl start  service -d GPIDB -s intershopserv
srvctl status service -d GPIDB -s intershopserv
Script um die Service auf den „richtigen“ Knoten zu starten ( für größere Umgebung auf denen vielen Service auf unterschiedlichen Knoten laufen ⇒ https://github.com/gpipperr/OraPowerShell/blob/master/Ora_Bash_env_DB_backup/scripts/relocate_rac_services.sh
Nach dem Einrichten des Service die TNS Einträge der Applikation anpassen, SCAN Listern und der neue Service Name muss verwendet werden um die Funktionalität vollständig zu nützen.
Für Webapplikation unter Weblogic steht für das automatische Failover das Feature GridLink zur Verfügung, siehe auch ⇒ Oracle Universal Connection Pool mit ONS verwenden.
TestCase Verfügbarkeit der Applikation
Nun eine Testcase bauen, um zu überwachen wie sich die Applikation während des Upgrades verhält.
Zum Beispiel Service auf Knoten 2 schwenken, und prüfen ob die Applikation mitwandert oder ein Neustart der Applikation notwendig wird.
Service auf einem Knoten stoppen ( 11g Syntax, da noch 11.2.0.4 im Einsatz!):
# Als DB Owner!
srvctl status service -d GPIDB

srvctl stop service -d GPIDB -s intershopserv -i GPIDB1 -v

srvctl status service -d GPIDB
Um die Sessions zu überwachen ist in SQL*Plus dieses Script hilfreich ⇒ https://github.com/gpipperr/OraPowerShell/blob/master/Ora_SQLPlus_SQLcL_sql_scripts/tns.sql
OS Update
Fehlende Pakete auf beiden Knoten einspielen:
yum install smartmontools
yum install psmisc
yum install xdpyinfo
# falls screen ist da ist nachinstallieren
yum install screen
OS Update Knoten 1
- DB Service auf Knoten 2 schwenken - Application auf Knoten 2 umziehen ( bei Weblogic Grid Link erfolgt das automatisch, im schlimmsten Fall Applikation neu starten)
- OS Update als root mit
yum update - Knoten neu starten
reboot
OS Update Knoten 2
- DB Service auf Knoten 1 schwenken - Application auf Knoten 2 umziehen ( bei Weblogic Grid Link erfolgt das automatisch, im schlimmsten Fall Applikation neu starten)
- OS Update als root mit
yum update - Knoten neu starten
reboot
ASM Compatibilität kontrollieren
Beim Aufruf des Installer ergab sich in dieser Umgebung das folgende Problem:
Problem 1: Disk group ASM compatibility setting - Check for disk group ASM compatibility setting Error: - PRVE-3175 : ASM compatibility for ASM disk group „VOTSPARE_S2“ is set to „11.2.0.0.0“, which is less than the minimum supported value „11.2.0.2.0“.
COLUMN COMPATIBILITY format A10
SELECT NAME,COMPATIBILITY FROM v$asm_diskgroup;

ALTER DISKGROUP FRA         SET ATTRIBUTE 'compatible.asm'='11.2.0.2.0';
Warum nicht alles gleich auf 12c? In dieser Umgebung laufen auch noch 11.2.0.4'er Datenbanken in Cluster mit.
Backup und ETL Jobs für die Downtime Zeit deaktiveren
Ensprechend hier auch alles vorbereiten das alles schön ruhig zugeht!
Patch im bestehenden GI Home einspielen
Problem beim Aufruf des Installers für die neue Version: Oracle patch:21255373:
This test checks that the Oracle patch „21255373“ has been applied in home „/opt/12.1.0.2/grid“. Action: Apply the required Oracle patch and retry.
⇒ PRVG-1261 : Required Oracle patch „21255373“ in home (Doc ID 2308775.1) ⇒ BUG 21255373 - CSSD : DUPLICATE RESPONSE IN GROUP DATA UPDATE
Lösung siehe ⇒ Patches to apply before upgrading Oracle GI and DB to 12.2.0.1 (Doc ID 2180188.1)
Version genau mit OPatch die aktuelle Version prüfen:
#User grid
/opt/12.1.0.2/grid/OPatch/opatch lsinventory
...
Oracle Grid Infrastructure 12c                                       12.1.0.2.0
...
# ist der gewünschte Patch da
/opt/12.1.0.2/grid/OPatch/opatch lsinventory | grep 21255373
# Leider nein .-(
In meinen Fall, ein Upgrade von 12.1.0.2 auf 12.2.0.1 wird benötigt:
| From Release | Bug#(s) | Patch | Description | Additional comments |
| 12.1.0.2 | 21255373 | 22646084 | 12.1.0.2.160419 (Apr 2016) Grid Infrastructure Patch Set Update (GI PSU) | Fix included in OCWPSU 12.1.0.2.160419 Recommended to install latest* 12.1.0.2 GI PSU. |
Wir brauchen also im ersten Schritt:
- den aktuellen OPatch ( Patch 6880880: OPatch patch of version 12.2.0.1.13 for Oracle software releases 12.1.0.x (installer) released in APR 2018 )
- latest* 12.1.0.2 GI PSU ⇒ siehe zuerst Doc ID 1454618.1 ⇒ Patch 27468957: GRID INFRASTRUCTURE PATCH SET UPDATE 12.1.0.2.180417 , p27468957_121020_Linux-x86-64.zip (MD5 5527CCFD68003B0B5663BFFCE9E50396 ) , 1,7GB
Leider damit auch noch zusätzlich min 12G freien Plattenplatz!
Patch Installation
Vorbereitung - Applikation auf beiden Knoten online - auf beiden Knoten durchführen!
- OPatch patchen ( Opatch im GI Home und jeden weiteren 12c R1 Home ersetzen)
# als user root
mv /opt/12.1.0.2/grid/OPatch /opt/12.1.0.2/grid/OPatch_OLD
cd /opt/oracle/install/patch
unzip p6880880_121010_Linux-x86-64.zip -d /opt/12.1.0.2/grid
chown -R grid:oinstall /opt/12.1.0.2/grid/OPatch
/opt/12.1.0.2/grid/OPatch/opatch version
- OCM Configuration, nicht mehr enthalten?? aus alten Opatch erzeugt! (ab OPatch 12.2.0.1.5 or later kann dieser Schritt entfallen!)
cd /opt/oracle/install
/opt/12.1.0.2/grid/OPatch_OLD/ocm/bin/emocmrsp
- Oracle Inventory überprüfen als Grid Owner!
su - grid
/opt/12.1.0.2/grid/OPatch/opatch lsinventory  -oh /opt/12.1.0.2/grid
- Patch auspacken als Grid Owner!
 cp p27468957_121020_Linux-x86-64.zip /opt/oracle/install/patch ; unzip p27468957_121020_Linux-x86-64.zip
chown -R grid:oinstall /opt/oracle/install/patch
- Auf Konflikte prüfen als user Root!
#falls folgendes Problem auftritt:
# Reason: Failed during Analysis: CheckSystemCommandsAvailable Failed, [ Prerequisite Status: FAILED, Prerequisite # output:
# The details are:
# Missing command :fuser]

yum install psmisc

/opt/12.1.0.2/grid/OPatch/opatchauto apply /opt/oracle/install/patch/27468957 -analyze
13 minuten Laufzeit
Problem: Opatch version check on racdb01 home /opt/oracle/product/12.1.0.2/dbhome_1 failed due to chmod: changing permissions of ‘/opt/12.1.0.2/grid/.patch_storage’: Operation not permitted
!!! Darauf achten auch in den Datenbank Homes den aktuellen Opatch installieren!!!
Zur Überwachung in einer zweiten Session mit adrci ein Tail auf das Cluster Log starten!
adrci
adrci>show homes
adrci>set home diag/crs/racdb01/crs
adrci>show alert -tail -f
Downtime Knoten 1 und Patch Knoten 1
- Applikation auf Knoten 2 schwenken
srvctl stop service -d GPIDB -s intershopserv  -n racdb01
srvctl status service -d GPIDB
# Applikation schwenken, z.b. Webserver neu starten etc.
- Als User Root nun den Patch einspielen , Datenbank Instance stoppen, ACFS umounten, Patch einspielen, bei Bedarf neu booten
# ACFS stoppen
# als user oracle
srvctl stop instance -d GPIDB -n racdb01
# als root
/opt/12.1.0.2/grid/bin/crsctl stat res -w "TYPE = ora.acfs.type" -p | grep VOLUME
# test
/sbin/acfsutil registry
# als root!
/opt/12.1.0.2/grid/bin/srvctl stop filesystem -d /dev/asm/voldiag1-70 -n racdb01
# test ob ungemounted mit
/sbin/acfsutil info fs
# falls nein unmounten
/bin/umount /opt/oracle/diag_acfs
# =====
# Patch auf Knoten 1 einspielen
/opt/12.1.0.2/grid/OPatch/opatchauto apply /opt/oracle/install/patch/27468957 -oh /opt/12.1.0.2/grid

# Neu starten nur ! falls so von Opatch gewünscht
#AFCS testen
/sbin/acfsutil info fs

#prüfen ob der Patch für den Cluster Upgrade auch installiert ist!
# User grid!
/opt/12.1.0.2/grid/OPatch/opatch lsinventory | grep 21255373
Problem: jdev-rt.jar does not exist
2018/07/10 22:32:59 CLSRSC-46: Error: '/opt/12.1.0.2/grid/suptools/tfa/release/tfa_home/jlib/jdev-rt.jar' does not exist

2018/07/10 22:33:00 CLSRSC-152: Could not set ownership on '/opt/12.1.0.2/grid/suptools/tfa/release/tfa_home/jlib/jdev-rt.jar'
Lösung siehe opatchauto/opatch apply failing with CLSRSC-46: Error: '<GRID_HOME>/suptools/tfa/release/tfa_home/jlib/jewt4.jar' does not exist (Doc ID 2409411.1)
-- sichern

$GRID_HOME/crs/sbs/crsconfig_fileperms.sbs
$GRID_HOME/crs/utl/<node>/crsconfig_fileperms

-- Dateien aus den Config Dateien löschen

$GRID_HOME/crs/sbs/crsconfig_fileperms.sbs
$GRID_HOME/crs/utl/<node>/crsconfig_fileperms

Folgende Zeilen:

unix %ORA_CRS_HOME%/suptools/tfa/release/tfa_home/jlib/jdev-rt.jar %HAS_USER% %ORA_DBA_GROUP% 0644
unix %ORA_CRS_HOME%/suptools/tfa/release/tfa_home/jlib/jewt4.jar %HAS_USER% %ORA_DBA_GROUP% 0644

-- Patch wieder anstarten

/opt/12.1.0.2/grid/OPatch/opatchauto resume
Prüfen ob die Instance auf Knoten 1 gestartet ist!
- Instance auf Knoten 1 Starten!
- Service nur auf Knoten 1 schalten und Instance auf Knoten 2 stoppen!
srvctl stop service -d GPIDB -s intershopserv  -n racdb02
srvctl status service -d GPIDB
# Applikation schwenken, z.b. Webserver neu starten etc.
- Als User Root nun den Patch einspielen , Datenbank Instance stoppen, ACFS umounten, Patch einspielen, bei Bedarf neu booten
Gleiche Schritte nun auf den Knoten 2 durchführen,darauf achten auf den richtigen Knoten das ACFS zu stoppen!
DB Home 12c patchen
Bei Patch des DB Homes mit dem GI PSU :
# 12c Oracle Home Patchen
# bei Fehler chmod: changing permissions of ‘....opatchautodb’: Operation not permitted
# chown -R oracle:oinstall /opt/oracle/product/12.1.0.2/dbhome_1/cfgtoollogs

/opt/oracle/product/12.1.0.2/dbhome_1/OPatch/opatchauto apply /opt/oracle/install/patch/27468957 -oh /opt/oracle/product/12.1.0.2/dbhome_1/

<fc #800000>**Problem:**</fc>Details: chmod: changing permissions of ‘/opt/oracle/product/12.1.0.2/dbhome_1/cfgtoollogs/opatchautodb’: Operation not permitted
com.oracle.glcm.patch.auto.OPatchAutoException: chmod: changing permissions of ‘/opt/oracle/product/12.1.0.2/dbhome_1/cfgtoollogs/opatchautodb’: Operation not permitted
Noch keine Lösung,evtl. muss der PSU der DB verwendet werden!
Bzgl. OVM siehe auch 1929745.1 Oracle Recommended Patches – „Oracle JavaVM Component Database PSU and Update“ (OJVM PSU and OJVM Update) Patches (Doc ID 1929745.1)
Ist läuft noch eine 11.2.0.4 ⇒ Letzten aktuellen Patch für die Datenbank installieren Stand April 2018 ⇒ Patch Patch 27338049: DATABASE PATCH SET UPDATE 11.2.0.4.180417 Last Updated 17-Apr-2018 + Patch 6880880: OPatch patch of version 11.2.0.3.18 for Oracle software releases 11.2.0.x (April 2018)
Der Cluster Update auf 12c R2
Mit der Release 12c R2 wird ein vorbereitetes Image des Cluster Homes mit den Installation Routinen verteilt. Dies Image wird in das neue Cluster Home kopiert und vor dort verteilt.
Vorbereitung:
- Min 10GB Platz im Filesystem !
- Min 40G Platz auf der Oracle ASM Luns auf der die GMIR (_MGMTDB ) Datenbank installiert ist!
- xForwarding ist eingerichtet und funktioniert!
- Grid Software + Patch für GMIR Bug bereitgestellt!
- Problem beim Aufruf des Installers
:ERROR: Unable to verify the graphical display setup. This application requires X display. Make sure that xdpyinfo exist under PATH variable.
Launching Oracle Grid Infrastructure Setup Wizard...
- Lösung:
yum install xdpyinfo
Software bereitstellen
- Oracle Database 12c Release 2 Grid Infrastructure (12.2.0.1.0) for Linux x86-64 herunterladen von http://www.oracle.com/technetwork/database/enterprise-edition/downloads/oracle12c-linux-12201-3608234.html oder von https://edelivery.oracle.com/
- MD5 Hash Checksum überprüfen!
- Software auf Knoten 1 und 2 bereitstellen
# Als user root
# Stage Dir auf beiden Knoten anlegen
mkdir /opt/oracle/install
#Software bereitstellen
cp  linuxx64_12201_grid_home.zip  /opt/oracle/install/12.2

#Checksum ermitteln und mit dem Wert auf der Oracle Website vergleichen
cksum linuxx64_12201_grid_home.zip
1523222538 2994687209 linuxx64_12201_grid_home.zip

#Rechte vergeben!
chown -R grid:oinstall /opt/oracle/install


#Neues Oracle Home anlegen auf beiden Knoten!

mkdir -p /opt/12.2.0.1/grid
chown -R grid:oinstall /opt/12.2.0.1/
- Software auf Knoten 1 auspacken
# Als user Grid
su - grid

cd /opt/12.2.0.1/grid
unzip -q /opt/oracle/install/12.2/linuxx64_12201_grid_home.zip
rm /opt/oracle/install/12.2/linuxx64_12201_grid_home.zip
Clufy Check RPM auf beiden Knoten installieren/upgraden
CVU RPM liegt jetzt unter $ORCLE_HOME/cv/rpm !
- Hier wieder als root user anmelden und auf BEIDEN Knoten installieren!
su -

# 12c R2 benötigt folgende Tools auf OS Seite see (Doc ID 1473340.1)
yum install smartmontools

# Was ist installiert
yum list  | grep cvuqdisk
cvuqdisk.x86_64                            1.0.9-1

cd /opt/12.2.0.1/grid/cv/rpm

CVUQDISK_GRP=oinstall; export CVUQDISK_GRP

yum install –nogpgcheck  cvuqdisk-1.0.10-1.rpm


#prüfen ob auch wirklich installiert:
yum list  | grep cvuqdisk

#Install on second node
scp cvuqdisk-1.0.10-1.rpm root@racdb02:/tmp
ssh racdb02

yum install smartmontools

CVUQDISK_GRP=oinstall; export CVUQDISK_GRP

yum install –nogpgcheck  /tmp/cvuqdisk-1.0.10-1.rpm
rm /tmp/cvuqdisk-1.0.10-1.rpm
#prüfen ob auch wirklich installiert:
yum list  | grep cvuqdisk
cvuqdisk.x86_64                            1.0.10-1

exit
Problem cvuqdisk-1.0.9-1.x86_64 was supposed to be removed but is not
Running transaction
ls: cannot access /usr/sbin/smartctl: No such file or directory
/usr/sbin/smartctl not found.
error: %pre(cvuqdisk-1.0.10-1.x86_64) scriptlet failed, exit status 1
Error in PREIN scriptlet in rpm package cvuqdisk-1.0.10-1.x86_64
cvuqdisk-1.0.9-1.x86_64 was supposed to be removed but is not!
see Support Portal „CVUQDISK install fails with /usr/sbin/smartctl: No such file or directory (Doc ID 1473340.1)“
Lösung ( auf beiden Knoten!):
yum install smartmontools
Installation auf Knoten 1 durchführen
Nun die Service der Applikation auf den Knoten 2 der Umgebung schwenken, damit der Knoten 1 nicht mehr produktiv ist:
# Als DB Owner ! mit der gesetzten DB Umgebung!
srvctl stop service -d GPIDB -s intershopserv -i GPIDB1 -v
srvctl status service -d GPIDB -s intershopserv
Service intershopserv is running on instance(s) GPIDB2
Nun kann die eigentliche Installation gestartet werden!
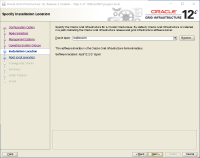
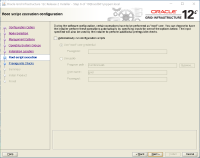
Darauf achten das die „Upgrade Oracle Grid Infrastructure „Option ausgewählt wird und „Running root scripts manually“ !!
Aus der Doku:
If you run root scripts manually, then run the script on the local node first. The script shuts down the earlier release installation, replaces it with the new Oracle Clusterware release, and starts the new Oracle Clusterware installation. After the script completes successfully, you can run the script in parallel on all nodes except for one, which you select as the last node. When the script is run successfully on all the nodes except the last node, run the script on the last node.
Auf Knoten 1
- Anmelden als user grid ( x forwarding muss klappen!)
Aus diesem Verzeichnis wird dann auch der Installer gestartet:
cd /u01/app/12.2.0.1/grid

./gridSetup.sh &
Bug --INSTALLER CHECKED THE WRONG DISKGROUP FOR GIMR
Problem:
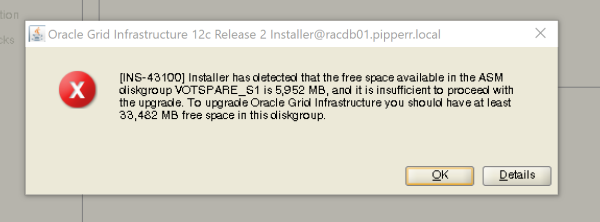
[INS-43100] Installer has detected that the free space available in the ASM diskgroup VOTSPARE_S1 is 11,139 MB, and it is insufficient to proceed with the upgrade. To upgrade Oracle Grid Infrastructure you should have at least 33,482 MB free space in this diskgroup.
ASM Disk Space für die Voting disk Gruppen prüfen
SELECT GROUP_NUMBER,NAME,STATE,TYPE,TOTAL_MB,FREE_MB,REQUIRED_MIRROR_FREE_MB, USABLE_FILE_MB FROM v$asm_diskgroup ORDER BY 1;
siehe auch Script unter https://github.com/gpipperr/OraPowerShell/blob/master/Ora_SQLPlus_SQLcL_sql_scripts/asm_disk.sql
10GB ist nun zu klein für 12c R2???? see [INS-43100] Insufficient Space Available In the ASM Diskgroup during 12c Grid Infrastructure upgrade or installation (Doc ID 1929754.1)
Requirements in der Doku nachlesen
Wir haben 6GB bzw. 10 GB für ORC und VOT ⇒ das ist ausreichend!
Nur wenn GMIR auf den Voting Platten liegt sollte das ein Problem sein, hier in dieser Umgebung liegt aber GMIR (_MGMTDB) auf +DATA!
BUG! BUG 25818789 - 12.2 INS-43100 AS INSTALLER CHECKED THE WRONG DISKGROUP FOR GIMR
See 12.2 Grid Infrastructure: INS-43100 and Storage Space Requirements (Doc ID 2245603.
Lösung: Patch „GI UPGRADE DOES NOT DETECT THE GIMR DG WHEN NOT COLOCATED IN OCR/VD DG (Patch) p25728869_122010_Generic.zip“ wird benötigt!
Patch muss nun in das Install Verzeichnis eingespielt werden, das Oracle Home für die neue GI Umgebung ist ja noch gar nicht registiert, soweit kommen wir ja gar nicht!
Wir müssen daher ( siehe auch das Readme zum Bug) mit <GI Home>/gridSetup.sh -applyOneOffs patch_location den Installer patchen
# Als Grid user
cp p25728869_122010_Generic.zip /opt/oracle/install/12.2
mkdir p25728869
cd p25728869
unzip /opt/oracle/install/12.2/p25728869_122010_Generic.zip

cd /opt/12.2.0.1/grid/

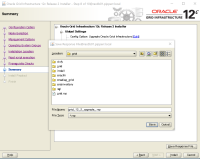
./gridSetup.sh -applyOneOffs /opt/oracle/install/12.2/p25728869/25728869/

Preparing the home to patch...
Applying the patch /opt/oracle/install/p25728869/25728869/...
Successfully applied the patch.
The log can be found at: /opt/oraInventory/logs/GridSetupActions2018-06-02_12-09-37PM/installerPatchActions_2018-06-02_12-09-37PM.log
Launching Oracle Grid Infrastructure Setup Wizard...
Darauf auchten das Unterverzeichnis auch richtig anzugeben!
sonst ⇒ Executing „gridSetup.sh“ Fails with „ERROR: The home is not clean“ (Doc ID 2279633.1)
ERROR: The home is not clean. This home cannot be used since there was a failed OPatch execution in this home. Use a different home to proceed.
Lösung: Software löschen und neu auspacken!
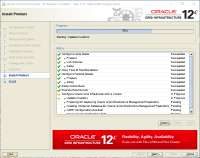
Installer mit dem Patch - Ablauf der Installation
Wichtig! Gut 40GB freien ASM Plattenplatz für die GMIR (_MGMTDB ) notwendig, sonst wird die Installation abgebrochen! Musste mir erst mal dafür neue Platten bauen 
Ablauf:
Bis hier ist die eigentliche Applikation noch online, beide Knoten sind noch aktiv!
Downtime starten
- Applikation auf Knoten 2 schwenken - DB auf Knoten 1 stoppen
srvctl stop service -d GPIDB -s intershopserv  -n racdb01
srvctl status service -d GPIDB

# Applikation schwenken, z.b. Webserver neu starten etc.

# als user oracle
srvctl stop instance -d GPIDB -n racdb01
- Root Script auf Knoten 1 ausführen, screen Session verwenden, jeder Sessionabbruch ist jetzt tödlich
# Als User root!
 cd /opt/12.2.0.1/grid/
 ./rootupgrade.sh
..
2018/06/04 12:56:12 CLSRSC-595: Executing upgrade step 1 of 19: 'UpgradeTFA'.
....
2018/06/04 13:07:25 CLSRSC-595: Executing upgrade step 19 of 19: 'PostUpgrade'.
2018/06/04 13:07:33 CLSRSC-325: Configure Oracle Grid Infrastructure for a Cluster ... succeeded
Dauert so um die 10 Minuten
- Cluster status auf Knoten 1 und 2 kontrollieren
#als Grid user
 /opt/12.2.0.1/grid/bin/crs_stat -t
- Instance und Servide auf dem ersten Knoten wieder starten
# als user oracle auf node 2 ausgeführt
srvctl start instance -d GPIDB -n racdb01
#service
srvctl start service -d GPIDB -s intershopserv  -n racdb01
srvctl status service -d GPIDB

# Applikation schwenken, z.b. Webserver neu starten etc.
- Applikation auf Knoten 1 schwenken - DB auf Knoten 2 stoppen
srvctl stop service -d GPIDB -s intershopserv  -n racdb02
srvctl status service -d GPIDB

# Applikation schwenken, z.b. Webserver neu starten etc.

# als user oracle
srvctl stop instance -d GPIDB -n racdb02
- Root Script auf Knoten 2 ausführen, screen Session verwenden, jeder Sessionabbruch ist jetzt tödlich
# Als User root!
 cd /opt/12.2.0.1/grid/
 ./rootupgrade.sh
..
2018/06/04 14:54:58 CLSRSC-595: Executing upgrade step 1 of 19: 'UpgradeTFA'.

....
2018/06/04 15:03:08 CLSRSC-595: Executing upgrade step 19 of 19: 'PostUpgrade'.
2018/06/04 15:03:33 CLSRSC-325: Configure Oracle Grid Infrastructure for a Cluster ... succeeded
Dauert wieder so um die 10 Minuten
Nun kann es weiter gehen
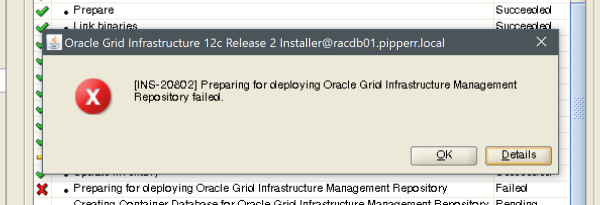
Und nun schon wieder der nächste BUG ⇒ Bug 25025157 - Dropping GIMR failed when upgrade 12101 GI to 12.2. (Doc ID 25025157.8)
INFO:  [Jun 4, 2018 3:15:04 PM] Read: SQL> Disconnected from Oracle Database 12c Enterprise Edition Release 12.1.0.2.0 - 64bit Production
INFO:  [Jun 4, 2018 3:15:04 PM] SQL> Disconnected from Oracle Database 12c Enterprise Edition Release 12.1.0.2.0 - 64bit Production
INFO:  [Jun 4, 2018 3:15:04 PM] Read: With the Partitioning, Automatic Storage Management and Advanced Analytics options
INFO:  [Jun 4, 2018 3:15:04 PM] With the Partitioning, Automatic Storage Management and Advanced Analytics options
INFO:  [Jun 4, 2018 3:15:04 PM] Read: Succeeded in creating PFILE '/opt/12.1.0.2/grid/dbs/init-dropmgmtdbSAVED.ora'
INFO:  [Jun 4, 2018 3:15:04 PM] Succeeded in creating PFILE '/opt/12.1.0.2/grid/dbs/init-dropmgmtdbSAVED.ora'
INFO:  [Jun 4, 2018 3:15:04 PM] Read: Dropping the Grid Infrastructure Management Repository database
INFO:  [Jun 4, 2018 3:15:04 PM] Dropping the Grid Infrastructure Management Repository database
INFO:  [Jun 4, 2018 3:15:04 PM] Stderr Read: DBD::Oracle::db do failed: ORA-01507: database not mounted (DBD ERROR: OCIStmtExecute) [for Statement "drop database"] at /opt/12.2.0.1/grid/crs/install/dropdb.pl line 67.
INFO:  [Jun 4, 2018 3:15:04 PM] Read: Couldn't execute SQL statement: ORA-01507: database not mounted (DBD ERROR: OCIStmtExecute)
INFO:  [Jun 4, 2018 3:15:04 PM] Couldn't execute SQL statement: ORA-01507: database not mounted (DBD ERROR: OCIStmtExecute)
INFO:  [Jun 4, 2018 3:15:04 PM] Read: Dropping the Grid Infrastructure Management Repository database failed
INFO:  [Jun 4, 2018 3:15:04 PM] Dropping the Grid Infrastructure Management Repository database failed
INFO:  [Jun 4, 2018 3:15:04 PM] Completed Plugin named: Preparing for deploying Oracle Grid Infrastructure Management Repository
Es folgen noch drei weitere Fehler, alle mit skip ignorieren und die Installation abschließen.
Zum Schluss pürfen welche Version online ist:
# Knoten 1
crsctl query crs activeversion
Oracle Clusterware active version on the cluster is [12.2.0.1.0]

# Knoten 2
 crsctl query crs activeversion
Oracle Clusterware active version on the cluster is [12.2.0.1.0]
Nun kann dieser Stand mit dem nächsten Patch auf den aktuellen PSU gehoben werden!
Aber zuvor müssen wir dieses doch sehr umständliche gebastelt mit der Management DB wieder reparieren.
MGMTDB nach Upgrade Problemen neu in 12c R2 aufbauen
Siehe auch How to Move/Recreate GI Management Repository (GIMR / MGMTDB) to Different Shared Storage (Diskgroup, CFS or NFS etc) (Doc ID 1589394.1) und Oracle Clusterware 12c - Grid Infrastructure Management Repository (GIMR) - Die MGMTDB Datenbank auf Knoten 1 (! Achtung nur für 12.1!)
Ab 12.2 ⇒ Für unsere 12c R2 Umgebung können wir auch mit dem MDBUtil: GI Management Repository configuration tool (Doc ID 2065175.1) arbeiten, das Script dazu kann dort auch geladen werden.
Fehlerhafte Reste von der MGMTDB aus der Installation löschen
Die DB ist nicht mehr richtig im Cluster registiert und läßt sich daher nicht starten
Ein Backup der Daten ist nun nicht mehr möglich:
#Backup the old entries
#racdb01
/bin/oclumon dumpnodeview -allnodes -v > racnode1_gmir_data.log
#racdb02
/bin/oclumon dumpnodeview -allnodes -v > racnode1_gmir_data.log
Testen ob noch Reste im Speicher laufen:
ps uafx | grep smon

grid     18649  0.0  0.0 1098960 4560 ?        Ss   Jun04   0:01 mdb_smon_-MGMTDB

# aber

srvctl status mgmtdb
Database is disabled
Database is not running.


# Konfiguration prüfen

srvctl config mgmtdb
Aus dem Cluster entfernen
Den Custer Health Monitor stoppen und disablen, die MGMTDB Resource löschen auf beiden Knoten!:
#user grid
srvctl stop mgmtdb

#User Root

export GRID_HOME=/opt/12.2.0.1/grid

$GRID_HOME/bin/crsctl stop res ora.crf -init

$GRID_HOME/bin/crsctl modify res ora.crf -attr ENABLED=0 -init

$GRID_HOME/bin/srvctl remove mgmtdb

Remove the database _mgmtdb? (y/[n]) y

#User grid
srvctl status mgmtdb
PRCD-1120 : The resource for database _mgmtdb could not be found.
PRCR-1001 : Resource ora.mgmtdb does not exist
Damit ist die mgmtdb aus dem Cluster entfernet!
DB löschen
# Umgebung auf die SID der -MGMTDB setzen

# 1. test mit
dbca -silent -deleteDatabase -sourceDB -MGMTDB
DBCA  does not support this operation in Grid Infrastructure Oracle Home.
Run DBCA from Database Oracle Home for database related operations.
# so geht das nicht!!


# per sqlplus an der DB anmelden

sqlplus / as sysdba
shutdow abort


# Spfile und andere Reste unter $GRID_HOME/dbs entfernen
#racnode 1
cd /opt/12.2.0.1/grid/dbs
rm hc_-MGMTDB.dat init-dropmgmtdb.ora init-dropmgmtdbSAVED.ora init-MGMTDB.ora lk_MGMTDB
cd /opt/12.2.0.1/grid/dbs
# ok
#racnode 2
cd /opt/12.1.0.2/grid/dbs
rm hc_-MGMTDB.dat init-dropmgmtdb.ora lk_MGMTDB
cd /opt/12.2.0.1/grid/dbs
#ok


#racnode 1
asmcmd
ASMCMD> cd +DATA
ASMCMD> rm -rf _MGMTDB/
Neu anlegen
Mit 12.2 gibt es das Werkzeug mdbutil.pl, die kompizierten Script mit DBCA sind nicht mehr notwendig.
Herunterladen von ⇒ MDBUtil: GI Management Repository configuration tool (Doc ID 2065175.1)
Auf dem Server stellen, Rechte auf execute setzen und aufrufen:
cp mdbutil.pl /opt/oracle/install
chmod 700 mdbutil.pl
./mdbutil.pl -h
DB nun neu anlegen mit:
./mdbutil.pl --addmdb --target=+DATA

mdbutil.pl version : 1.93
2018-06-05 16:06:58: I Starting To Configure MGMTDB at +DATA...
2018-06-05 16:07:03: I Container database creation in progress... for GI 12.2.0.1.0
2018-06-05 16:17:00: I Plugable database creation in progress...
2018-06-05 16:27:50: I Executing "/tmp/mdbutil.pl --addchm" on racdb01 as root to configure CHM.
root@racdb01's password:
2018-06-05 16:28:24: W Not able to execute "/tmp/mdbutil.pl --addchm" on racdb01 as root to configure CHM.
2018-06-05 16:28:25: I Executing "/tmp/mdbutil.pl --addchm" on racdb02 as root to configure CHM.
root@racdb02's password:
2018-06-05 16:28:32: W Not able to execute "/tmp/mdbutil.pl --addchm" on racdb02 as root to configure CHM.
2018-06-05 16:28:32: I MGMTDB & CHM configuration done!
22 Minuten!!! - Das heißt es Nerven bewahren!
In zweiter Session überwachen mit:
adrci
adrci> show homes
adrci> set home diag/rdbms/_mgmtdb/-MGMTDB
adrci> show alert -tail -f
Check:
./mdbutil.pl  --status
mdbutil.pl version : 1.93
2018-06-05 16:29:39: I Checking CHM status...
2018-06-05 16:29:41: I Listener MGMTLSNR is configured and running on racdb01
2018-06-05 16:29:43: I Database MGMTDB is configured and running on racdb01
2018-06-05 16:29:44: W Cluster Health Monitor (CHM) is configured and not running on racdb01!
Cluster Patchen
Wir brauchen für den 12c GI April CPU:
- Patch 27468969: GI APR 2018 RELEASE UPDATE 12.2.0.1.180417 - p27468969_122010_Linux-x86-64.zip - MD5 53510CEAAEB648A753353A149568C5FC
- The Grid Infrastructure Apr 2018 Release Update 12.2.0.1.180417 includes updates for both the Clusterware home and Database home that can be applied in a rolling fashion.
und
- OPatch utility version 12.2.0.1.6 or later ( My Oracle Support patch 6880880 ) ⇒ OPatch patch of version 12.2.0.1.13 for Oracle software releases DB 12.2.0.x and DB 18.x (APR 2018) (Patch) p6880880_122010_Linux-x86-64.zip ⇒ MD5 263B24D0C8CC9EDC17CC9601CDE35267
Da auch noch ein paar Datenbank unter 11.2.0.4 im Cluster Verbund laufen auch diesen Patch mit berücksichtigen ⇒ Patch 26925576: DATABASE PATCH SET UPDATE 11.2.0.4.180116
Aus dem Cluster Patch „For Database home with version other than 12.2.0.1, apply the appropriate Database RU for that version. For example, apply 12.2.0.1.x RU to Database version 12.2.0.1.0.“ ⇒ wir brauchen für die 11.2.04 DB den DATABASE PATCH SET + passenden patch 6880880 !
Achtung! mit der 11g Umgebung hat aber OPatch einige Probleme!
Opatch aktualisieren
Wie immer zuerst Opatch aktualisieren ⇒ OPatch patch of version 12.2.0.1.13 for Oracle software releases DB 12.2.0.x and DB 18.x (APR 2018) (Patch) p6880880_122010_Linux-x86-64.zip ⇒ MD5 263B24D0C8CC9EDC17CC9601CDE35267
- Opatch aktualisieren
#Patch kopieren
cp p6880880_122010_Linux-x86-64.zip   /opt/oracle/install/patch
scp p6880880_122010_Linux-x86-64.zip  racdb02:/opt/oracle/install/patch

# check md5sum
md5sum p6880880_122010_Linux-x86-64.zip
263b24d0c8cc9edc17cc9601cde35267  p6880880_122010_Linux-x86-64.zip


#auspacken
cd /opt/12.2.0.1/grid/

mv OPatch/ OPatch_orig

unzip -q /opt/oracle/install/patch/p6880880_122010_Linux-x86-64.zip

#rechte
chown -R grid:oinstall OPatch

#Test
cd OPatch
./opatch version
OPatch Version: 12.2.0.1.13
Auf beiden Knoten durchführen!
Opatch auch in 11g Home gleich wie oben aber mit der Version für 11g updaten, falls noch nicht erledigt!
- Grid Patch bereitstellen
cp p27468969_122010_Linux-x86-64.zip /opt/oracle/install/patch
scp p27468969_122010_Linux-x86-64.zip  racdb02:/opt/oracle/install/patch

#check , die paranoiden testen auf beiden Knoten
md5sum p27468969_122010_Linux-x86-64.zip

53510ceaaeb648a753353a149568c5fc  p27468969_122010_Linux-x86-64.zip
ab 01.07
55c8cddc0b98f0cb9eb9dc99bebc3067 !


# auspacken auf beiden knoten
unzip -q p27468969_122010_Linux-x86-64.zip
chown -R grid:oinstall /opt/oracle/install
- Den Patch auf Konflikte prüfen als user Root!
#auf beiden Knoten!! als Grid uwer
$ORACLE_HOME/OPatch/opatch prereq CheckConflictAgainstOHWithDetail -phBaseDir /opt/oracle/install/patch/27468969/27674384
$ORACLE_HOME/OPatch/opatch prereq CheckConflictAgainstOHWithDetail -phBaseDir /opt/oracle/install/patch/27468969/27464465
$ORACLE_HOME/OPatch/opatch prereq CheckConflictAgainstOHWithDetail -phBaseDir /opt/oracle/install/patch/27468969/27458609
$ORACLE_HOME/OPatch/opatch prereq CheckConflictAgainstOHWithDetail -phBaseDir /opt/oracle/install/patch/27468969/26839277
# müssen alle so aussehen!
$ORACLE_HOME/OPatch/opatch prereq CheckConflictAgainstOHWithDetail -phBaseDir /opt/oracle/install/patch/27468969/27144050
Oracle Interim Patch Installer version 12.2.0.1.13
Copyright (c) 2018, Oracle Corporation.  All rights reserved.

PREREQ session

Oracle Home       : /opt/12.2.0.1/grid
Central Inventory : /opt/oraInventory
   from           : /opt/12.2.0.1/grid/oraInst.loc
OPatch version    : 12.2.0.1.13
OUI version       : 12.2.0.1.4
Log file location : /opt/12.2.0.1/grid/cfgtoollogs/opatch/opatch2018-06-05_18-55-26PM_1.log

Invoking prereq "checkconflictagainstohwithdetail"

Prereq "checkConflictAgainstOHWithDetail" passed.

OPatch succeeded.
- Prüfen ob genug Platz ist
vi /tmp/patch_list_gihome.txt
/opt/oracle/install/patch/27468969/27674384
/opt/oracle/install/patch/27468969/27464465
/opt/oracle/install/patch/27468969/27458609
/opt/oracle/install/patch/27468969/26839277
/opt/oracle/install/patch/27468969/27144050

$ORACLE_HOME/OPatch/opatch prereq CheckSystemSpace -phBaseFile /tmp/patch_list_gihome.txt
..
Invoking prereq "checksystemspace"

Prereq "checkSystemSpace" passed.

OPatch succeeded.
...
Downtime Knoten 1 und Patch Knoten 1
- Applikation auf Knoten 2 schwenken
srvctl stop service -d GPIDB -s intershopserv  -n racdb01
srvctl status service -d GPIDB
# Applikation schwenken, z.b. Webserver neu starten etc.
- Als User Root nun den Patch einspielen , Datenbank Instance stoppen, ACFS umounten, Patch einspielen, bei Bedarf neu booten
# ACFS stoppen
# als user oracle
srvctl stop instance -d GPIDB -n racdb01
# als root
/opt/12.2.0.1/grid/bin/crsctl stat res -w "TYPE = ora.acfs.type" -p | grep VOLUME
# test
/sbin/acfsutil registry
# als root!
/opt/12.2.0.1/grid/bin/srvctl stop filesystem -d /dev/asm/voldiag1-70 -n racdb01
# test ob ungemounted mit
/sbin/acfsutil info fs
# falls nein unmounten
/bin/umount /opt/oracle/diag_acfs


# =====
# Patch auf Knoten 1 einspielen

export PATH=$PATH:/opt/12.2.0.1/grid/OPatch

/opt/12.2.0.1/grid/OPatch/opatchauto apply /opt/oracle/install/patch/27468969 -oh /opt/12.2.0.1/grid


# Neu starten nur ! falls so von Opatch gewünscht
#AFCS testen
/sbin/acfsutil info fs
13 minuten!
Downtime Knoten 2 und Patch Knoten 2
Gleiche Schritte nun auf den Knoten 2 durchführen,darauf achten auf den richtigen Knoten das ACFS zu stoppen!
- Service umziehen
# als user oracle

srvctl start instance -d GPIDB -n racdb01
srvctl start service  -d GPIDB -s intershopserv  -n racdb01


srvctl stop service -d GPIDB -s intershopserv  -n racdb02
srvctl stop instance -d GPIDB -n racdb02
- Als User Root nun den Patch einspielen , Datenbank Instance stoppen, ACFS umounten, Patch einspielen, bei Bedarf neu booten
# als root

# ACFS stoppen
/opt/12.2.0.1/grid/bin/crsctl stat res -w "TYPE = ora.acfs.type" -p | grep VOLUME

# test
/sbin/acfsutil registry

# als root!
/opt/12.2.0.1/grid/bin/srvctl stop filesystem -d /dev/asm/voldiag1-70 -n racdb02

# test ob ungemounted mit
/sbin/acfsutil info fs

# falls nein unmounten
/bin/umount /opt/oracle/diag_acfs


# =====
# Patch auf Knoten 2 einspielen

export PATH=$PATH:/opt/12.2.0.1/grid/OPatch

/opt/12.2.0.1/grid/OPatch/opatchauto apply /opt/oracle/install/patch/27468969 -oh /opt/12.2.0.1/grid


# Neu starten nur ! falls so von Opatch gewünscht
#AFCS testen
/sbin/acfsutil info fs
13 minuten!
Problem - Falls im 11g Oracle Home das das falsche Java erkannt wird (ab Linux 7.4!)
Lösung: das JRE im 11g Home ist zu alt, bei Check der DB Homes des clustes wird anscheinend etwas mit dem Opatch des Oracle Homes aufgerufen, in dem Fall mit dem 11g Home und dort ist das java zu alt…
OPATCHAUTO-72050: System instance creation failed.
OPATCHAUTO-72050: Failed while retrieving system information.
OPATCHAUTO-72050: Please check log file for more details.

OPatchauto session completed at Sun Apr 15 23:20:12 2018
Time taken to complete the session 1 minute, 8 seconds

Topology creation failed.


2018-04-15 23:20:11,792 FINE  [1] com.oracle.glcm.patch.auto.db.product.driver.crs.AbstractCrsProductDriver - Checking whether Oracle Home "/u01/app/oracle/product/11.2.0.4/dbhome_1" is shared or not.


2018-04-15 23:20:12,000 INFO  [53] oracle.dbsysmodel.driver.sdk.util.OsysUtility$ReaderThread -
2018-04-15 23:20:12,000 INFO  [53] oracle.dbsysmodel.driver.sdk.util.OsysUtility$ReaderThread - Unsupported Java version 1.6.
2018-04-15 23:20:12,000 INFO  [53] oracle.dbsysmodel.driver.sdk.util.OsysUtility$ReaderThread - Java version should be 1.7 or higher.
2018-04-15 23:20:12,000 INFO  [53] oracle.dbsysmodel.driver.sdk.util.OsysUtility$ReaderThread -
2018-04-15 23:20:12,000 INFO  [53] oracle.dbsysmodel.driver.sdk.util.OsysUtility$ReaderThread - No valid java found for patching.opatchauto cannot proceed!

2018-04-15 23:20:12,003 INFO  [1] oracle.dbsysmodel.driver.sdk.util.OsysUtility - Error message :::
2018-04-15 23:20:12,004 INFO  [1] oracle.dbsysmodel.driver.sdk.util.OsysUtility - Output message :::
2018-04-15 23:20:12,004 SEVERE [1] com.oracle.glcm.patch.auto.db.integration.model.productsupport.topology.TopologyCreator - Not able to retrieve system instance details :: IOException during persisting of HostData

2018-04-15 23:20:12,004 SEVERE [1] com.oracle.glcm.patch.auto.db.integration.model.productsupport.topology.TopologyCreator - Failure reason::null
Debug:
test der Java Version im 11.2 Home
[root@ dbhome_1]# ./OPatch/jre/bin/java -version
java version "1.6.0_65"
Java(TM) SE Runtime Environment (build 1.6.0_65-b14)
Java HotSpot(TM) 64-Bit Server VM (build 20.65-b04, mixed mode)
Hier könnte eine der Ursachen liegen,
Links setzen auf beiden Konoten!
cd /u01/app/oracle/product/11.2.0.4/dbhome_1/OPatch

mv jre/ jre_orig

ln -s /u01/app/12.2.0.1/grid/OPatch/jre/ jre
Erneut testen ….
Altes GI Home entfernen
Das Alte Home muss komplett deregistriert werden! Daher „richtig“ entfernen“
Zum Testen erstmal das Verzeichnis als root mit einen _ auskommentieren
#als root
# im neuen GI Home mit "./crsctl stop crs" Cluster stoppen


#Umbennenen
cd /opt
mv 12.1.0.2/ _12.1.0.2/

#Cluster neu starten und testen ob alles geht
cd /opt/12.2.0.1/grid/bin/
./crsctl start crs

# nach ein paar Minuten prüfen ob alles klappt

# scheint alles aus dem neuen Home zu kommen, weider zurück bennen
cd /opt
mv _12.1.0.2/ 12.1.0.2/
Altes GI Home deregistrieren und löschen
Siehe ⇒ https://docs.oracle.com/database/121/CWLIN/rem_orcl.htm#CWLIN345
Voraussetzung: 1,3GB für den Deinstaller und danach noch min 400MB frei in /tmp!
D.h ich habe jetzt gerade keine Platz mehr etwas zu löschen … grr…..
# eine Möglichkeit sind die alten Rollbacks für die Patche löschen
/opt/12.1.0.2/grid/.patch_storage
rm -rf 2*
# bringt fast 4GB
Zuerst mal sehen was passieren würde:
# als Grid user
# in das alte GI Home springen:
cd /opt/12.1.0.2/grid/deinstall

./deinstall -checkonly

...
####################### DECONFIG CHECK OPERATION SUMMARY #######################
Oracle Grid Infrastructure Home is: /opt/12.2.0.1/grid
The following nodes are part of this cluster: racdb01,racdb02
Active Remote Nodes are racdb02
The cluster node(s) on which the Oracle home deinstallation will be performed are:racdb01,racdb02
Oracle Home selected for deinstall is: /opt/12.1.0.2/grid
Inventory Location where the Oracle home registered is: /opt/oraInventory
The home being deconfigured is NOT a configured Grid Infrastructure home (/opt/12.2.0.1/grid)
ASM was not detected in the Oracle Home
Oracle Grid Management database was found in this Grid Infrastructure home
Oracle Grid Management database will be de-configured from this Grid Infrastructure home
...
Hmm, das mit der Management DB ist eigentlich falsch ein „srvctl config mgmtdb“ zeigt auch keine Abhängigkeiten, wagen wir es mal
Rechte zuvor setzen:
chown -R grid:oinstall /opt/12.1.0.2
chmod -R 775 /opt/12.1.0.2
# Prüfen!
pwd
/opt/12.1.0.2/grid/deinstall
echo $ORACLE_HOME
/opt/12.1.0.2/grid

#Umgebung und Verzeichnis ist also richtig im alten Home!

./deinstall

######################## DEINSTALL CLEAN OPERATION START ########################
## [START] Preparing for Deinstall ##
Setting LOCAL_NODE to racdb01
Setting REMOTE_NODES to racdb02
Setting CLUSTER_NODES to racdb01,racdb02
Setting CRS_HOME to false
Setting oracle.installer.invPtrLoc to /tmp/deinstall2018-06-05_05-25-43PM/oraInst.loc
Setting oracle.installer.local to false

## [END] Preparing for Deinstall ##

Setting the force flag to false
Setting the force flag to cleanup the Oracle Base
Oracle Universal Installer clean START

Detach Oracle home '/opt/12.1.0.2/grid' from the central inventory on the local node : Done

Failed to delete the directory '/opt/12.1.0.2/grid/inventory'. The directory is in use.
Failed to delete the file '/opt/12.1.0.2/grid/root.sh'. The file is in use.
Failed to delete the directory '/opt/12.1.0.2/grid/QOpatch'. The directory is in use.
Failed to delete the directory '/opt/12.1.0.2/grid/addnode'. The directory is in use.
Failed to delete the directory '/opt/12.1.0.2/grid/assistants'. The directory is in use.

=> ?????

Oracle Universal Installer cleanup completed with errors.

Oracle Universal Installer clean END


## [START] Oracle install clean ##

Clean install operation removing temporary directory '/tmp/deinstall2018-06-05_05-25-43PM' on node 'racdb01'
Clean install operation removing temporary directory '/tmp/deinstall2018-06-05_05-25-43PM' on node 'racdb02'

## [END] Oracle install clean ##


######################### DEINSTALL CLEAN OPERATION END #########################


####################### DEINSTALL CLEAN OPERATION SUMMARY #######################
Successfully detached Oracle home '/opt/12.1.0.2/grid' from the central inventory on the local node.
Failed to delete directory '/opt/12.1.0.2/grid' on the local node.
Successfully detached Oracle home '/opt/12.1.0.2/grid' from the central inventory on the remote nodes 'racdb02'.
Failed to delete directory '/opt/12.1.0.2/grid' on the remote nodes 'racdb02'.
Oracle Universal Installer cleanup completed with errors.

Oracle deinstall tool successfully cleaned up temporary directories.
#######################################################################


############# ORACLE DEINSTALL TOOL END #############
Und warum geht das jetzt nicht ? Rechte zur vor nicht gesetzt! Könnte eine Ursache sein! Ein PS zeigt nicht an das aus diesen Verzeichnisse noch etwas läuft ! Clusterstack läuft auch komplett aus dem neuen Home!
Als root:
#auf beiden Knoten Verzeichnis 12.1.0.2 umbenneen
mv 12.1.0.2 _12.1.0.2

reboot

#teste ob alles geht

rm -rf /opt/_12.1.0.2
Quellen
Oracle Dokumentation
Performing Rolling Upgrade of Oracle Grid Infrastructure
Support:
- Assistant: Download Reference for Oracle Database/GI Update, Revision, PSU, SPU(CPU), Bundle Patches, Patchsets and Base Releases (Doc ID 2118136.2)
- Rolling Patch - OPatch Support for RAC (Doc ID 244241.1)
- How to Upgrade to/Downgrade from Grid Infrastructure 12.2 and Known Issues (Doc ID 2240959.1)
- Patches to apply before upgrading Oracle GI and DB to 12.2.0.1 (Doc ID 2180188.1)
- Oracle Recommended Patches – „Oracle JavaVM Component Database PSU and Update“ (OJVM PSU and OJVM Update) Patches (Doc ID 1929745.1)

